

Expense Reports
Create an Expense Report
- Navigate below to the
My expense submissionstable.
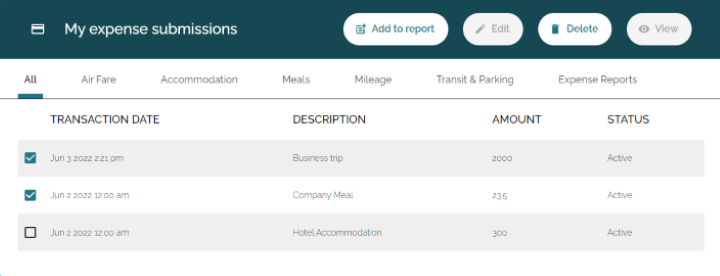
- Select the expenses you would like to include in the report by checking the boxes next to each expense.
- When done, press the
Add to reportbutton on the top of the table. This will open a new tab.

- Create a new expense report, and add a name and description.
- Submit the expense report.
Expense Report Statuses
- Press the
≡button on the top right to open the navigation menu. - From there, press the
Expense Reportsbutton to view the Expense Reports table. - You can view the status of all expense reports previously submitted with this table.
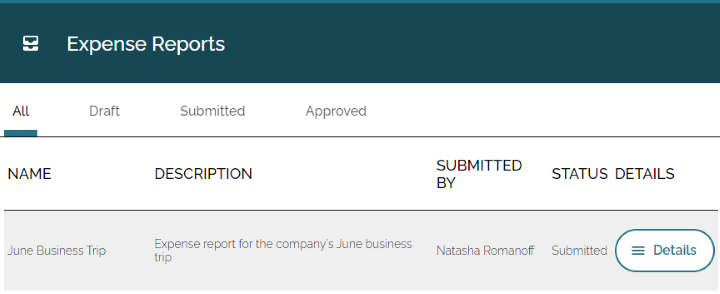
- Below is a table describing what each different status means:
| Status | Description |
|---|---|
| Draft | The expense report is still a draft and needs to be submitted. |
| Submitted | The expense report has been submitted and needs to be approved or rejected. |
| Approved | The expense report has been approved! |
| Rejected | The expense report has been rejected. |
Submit an Expense Report
- Press the
≡button on the top right to open the navigation menu. - From there, press the
Expense Reportsbutton to view the Expense Reports table. - Next, click the
≡ Detailsbutton on the draft expense report you would like to submit.
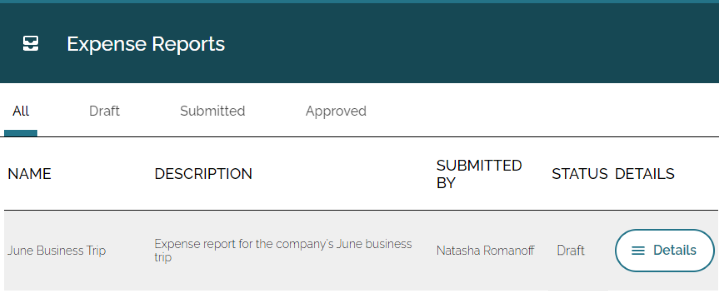
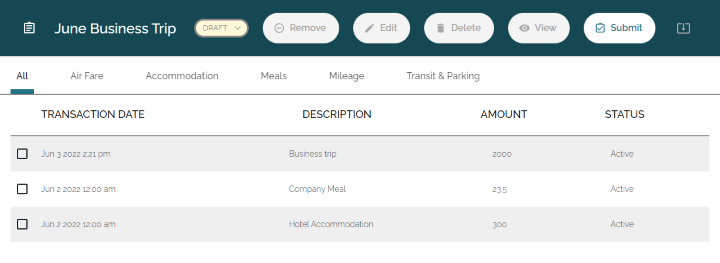
- This will open up a new table displaying the details of the expense report.
- Simply press the
Submitbutton on the top right corner of the table to submit the expense report.
Approve an Expense Report
- Press the
≡button on the top right to open the navigation menu. - From there, press the
Expense Reportsbutton to view the Expense Reports table. - Next, click the
≡ Detailsbutton on the submitted expense report you would like to approve.
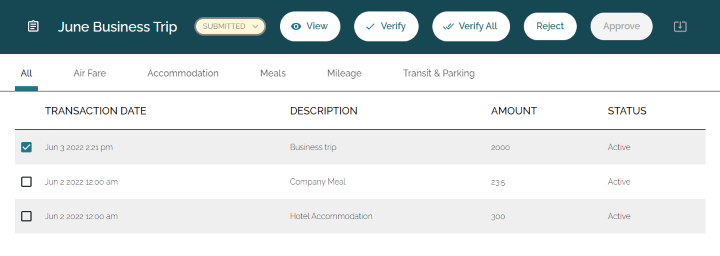
- This will open up a new table displaying the details of the expense report.
- Before you can approve the report, you must verify each expense within the report.
- To do this, you can select each expense by checking the box next to it, and then press the
Verifybutton on the top of the table. - You can also use the
Verify Allbutton to verify all the expenses in the report. - Once all the expenses are verified, you can simply press the
Approvebutton to approve the expense report.